Easy Textured Crochet Scarf: Free Beginner Pattern
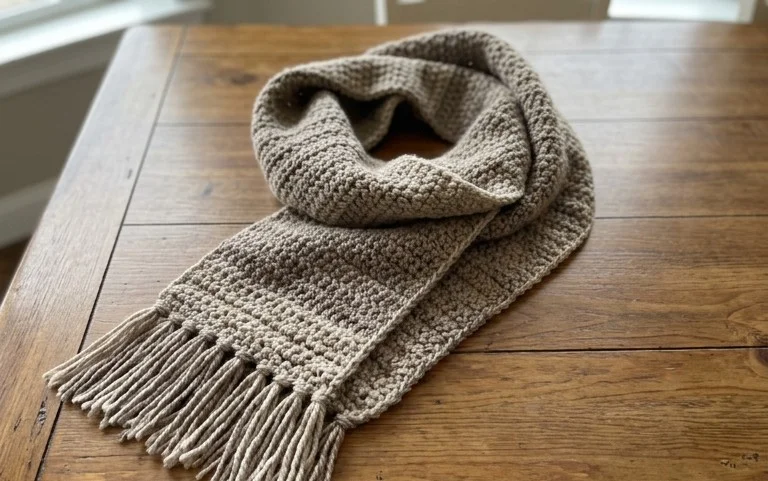
Soft wool against your neck makes this accessory a winter staple you will reach for every morning. This project relies on a simple repeating sequence of stitches that creates a squishy, ribbed texture without requiring advanced skills. Beginners often find this pattern rewarding because the fabric grows quickly, providing instant gratification as you work through the rows. Making this piece is a quiet way to spend an evening while listening to a podcast or enjoying a warm cup of tea. You will learn how to maintain consistent tension while alternating between basic stitches to achieve a professional finish.
Why You’ll Love This Pattern
Creating a classic crochet drawstring pouch is a satisfying way to practice working in the round while producing a functional item for your home or gift-giving. This project works up quickly using basic stitches, making it an ideal choice for using up small amounts of leftover cotton yarn. The final structure provides a sturdy base and a secure closure, perfect for holding jewelry, small notions, or coins. Its repetitive nature allows you to develop a consistent rhythm, which helps maintain even tension throughout the entire piece.
I managed to finish two of these in an afternoon. The instructions were very easy to follow and the base came out perfectly flat without any curling.
— Sarah, hobbyist crocheter
Pattern Overview & Skill Level
- Skill Level: Beginner
- Approximate Time: 1.5 to 2 hours
- Construction: Worked in continuous rounds from the base upward, with a final row for the drawstring channel.
- Finished Dimensions: 4 inches wide by 5 inches tall when laid flat.
Materials & Supplies Needed
- Yarn: Worsted weight (#4), 100% cotton yarn, approximately 60 yards.
- Hook Size: 4.5 mm (US size 7) to achieve a tight, dense fabric that hides contents.
- Notions: Tapestry needle for weaving in ends, a locking stitch marker to track round starts, and 12 inches of cotton cord or ribbon for the drawstring.
- Safe Yarn Substitutions: Acrylic worsted weight yarn can be used, though it will result in a slightly softer, more stretchy pouch. Avoid bulky wool, as it will make the drawstring channel too thick to cinch comfortably.
Stitch Guide & Abbreviations (US Terms)
- MR: Magic Ring.
- ch: Chain.
- sc: Single crochet.
- inc: Increase (work 2 sc into the same stitch).
- dc: Double crochet.
- sl st: Slip stitch.
- st/sts: Stitch/stitches.
- BLO: Back loop only.
Special Stitch Notes
The drawstring channel is created by alternating dc and ch-1 spaces. This creates a flexible gap that allows the cord to weave easily through the top of the pouch.
Step-by-Step Pattern Instructions
Pouch Base and Body
- Rnd 1: Start with a MR and work 6 sc into the ring. Tighten to close. (6 sts)
- Rnd 2: Work 2 sc in each st around. (12 sts)
- Rnd 3: [1 sc, inc] 6 times around. (18 sts)
- Rnd 4: [2 sc, inc] 6 times around. (24 sts)
- Rnd 5: [3 sc, inc] 6 times around. (30 sts)
- Rnd 6: [4 sc, inc] 6 times around. (36 sts)
- Rnd 7: Work sc in BLO in each st around. (36 sts)
- Rnds 8-18: Work 1 sc in each st around. (36 sts)
Drawstring Channel and Finishing
- Rnd 19: Ch 3 (counts as first dc), skip 1 st, 1 dc in next st, [ch 1, skip 1, 1 dc in next st] 17 times. Join with a sl st to the 2nd ch of starting ch-3. (18 dc, 18 ch-1 spaces)
- Rnd 20: Ch 1, 1 sc in each dc and each ch-1 space around. Join with a sl st to the first sc. (36 sts)
- Finishing: Fasten off, leaving a 6-inch tail to weave in securely on the inside. Thread your cord or ribbon through the spaces in Rnd 19, weaving in and out of the dc stitches.
Care & Washing Instructions
- Hand wash in cool water with a mild detergent to prevent the cotton fibers from shrinking.
- Lay the pouch flat on a clean towel to air dry, reshaping it with your hands while damp.
- Avoid using a tumble dryer, as high heat can damage the structure of the cotton stitches and cause the pouch to lose its shape.
Pro Tips & Common Mistakes to Avoid
- Maintain consistent tension by holding your yarn with a steady grip, ensuring the stitches are tight enough to prevent gaps where contents might fall through.
- Use a locking stitch marker at the start of every round to keep track of your position, as continuous rounds can be difficult to count visually.
- Weave in your yarn tails by running the needle through the stitches on the inside of the pouch in three different directions to ensure they remain secure.
- Adjust the size of the pouch by increasing the diameter of the base in increments of 6 stitches, but keep in mind that larger bags will require more yardage to complete.
Frequently Asked Questions
Can I use a larger hook for this pattern?
Using a larger hook will result in a larger, looser pouch. If you do this, ensure the stitches are still close enough to hold the items you plan to store inside.
How do I join the finished pouch if I want it to be more decorative?
You can finish the top edge with a round of crab stitch (reverse single crochet) after the drawstring channel to add a finished, professional look to the opening.
Is this pattern suitable for complete beginners?
Yes, this is an excellent pattern for beginners because it uses only basic stitches and does not require complex shaping or color changes.
Am I allowed to sell pouches made from this design?
You are welcome to sell finished items created from this pattern, provided you credit the designer and use your own original photographs for your listings.
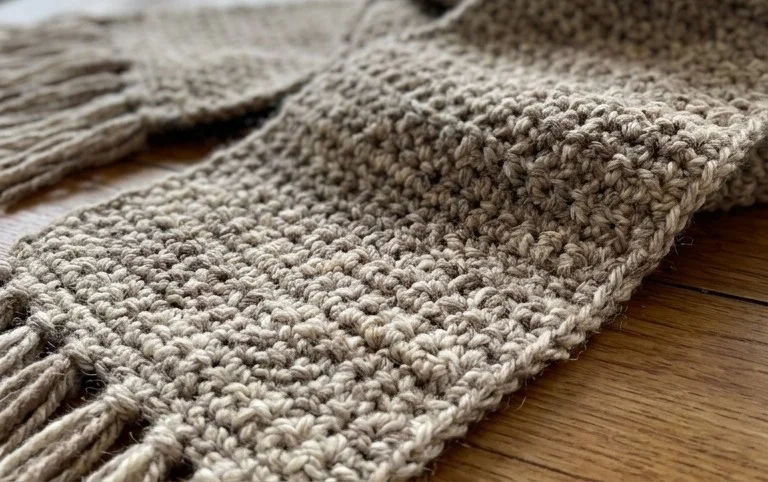
You now have a warm, stylish wrap that adds a bit of handmade comfort to any outfit you wear this season. Try working this pattern in a variegated yarn if you want a bold look, or stick to a solid neutral tone for a classic accessory that matches everything in your closet. Post a photo of your finished work on social media to show off those clean, even stitches. Check out the archives on the blog for more free patterns to fill your weekend afternoons with creative projects.