Elements CAL Crochet Square: Free Beginner Step-by-Step
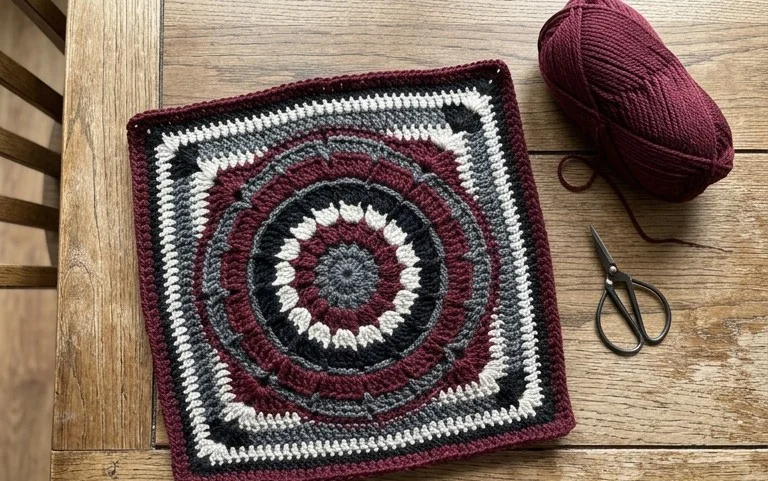
A crisp woolen square brings a sense of order to any handmade blanket or cushion project. This piece has a clean, geometric structure that sits flat against your knees, offering a firm texture that stands up to daily use. It is a rewarding project for beginners learning to control tension and experienced makers who need a mindless, portable task for quiet evenings. You will master the fundamentals of keeping square corners and maintaining even stitch counts throughout every round. These blocks come together quickly, making them a sensible choice for those who want to see steady progress on their handmade decor.
Why This Project Is Worth Making
The Classic Crochet Granny Square is the quintessential building block of crochet. You will appreciate this project because it is exceptionally portable, allowing you to work on small squares during commutes or while waiting for appointments. It is the best method for using up leftover yarn scraps, as each round can be worked in a different color to create a unique aesthetic. The repetitive nature of the double crochet stitches is meditative and makes it easy to memorize, which is ideal for those who enjoy relaxing with their hook in the evening. Because each square is independent, you can complete a project in short sessions without needing to commit to a massive, long-term undertaking.
I have been crocheting for years but always avoided granny squares until I tried this method. It is finally clear how to keep the corners sharp and the center from curling. The finished squares are perfectly flat and ready for joining into a blanket.
— Sarah, hobbyist maker
Pattern Overview & Skill Level
- Skill Level: Beginner
- Approximate Time: 30 to 45 minutes per 6-inch square
- Construction: Worked in joined rounds, starting from the center and moving outward
- Finished Dimensions: Approximately 6 inches by 6 inches when using worsted weight yarn and a 5.0 mm hook
Materials & Supplies Needed
- Yarn: Worsted weight (#4), 100% wool or acrylic blend, approximately 20 yards per square.
- Hook Size: 5.0 mm (US H-8).
- Notions: Tapestry needle for weaving in ends, scissors, and a measuring tape.
- Yarn Substitutions: You can use DK weight yarn for a smaller, more delicate square, though you will need to increase the number of rounds to reach the same dimensions. Cotton yarn produces a stiffer, more defined square compared to the softer drape of acrylic or wool.
Stitch Guide & Abbreviations (US Terms)
- ch = chain
- dc = double crochet
- sl st = slip stitch
- sp = space
- MR = magic ring (or ch 4 and join with sl st to form a ring)
- cluster = a group of 3 dc stitches worked into the same space
Step-by-Step Pattern Instructions
Center and Foundation
- Round 1: Create a MR. Ch 3 (counts as first dc), work 2 dc into the ring. Ch 2, work 3 dc into the ring. Ch 2, work 3 dc into the ring. Ch 2, work 3 dc into the ring. Ch 2, sl st to the top of the initial ch 3 to join. (12 dc, 4 ch-2 spaces)
Expanding the Square
- Round 2: Sl st into the first ch-2 corner space. Ch 3, 2 dc, ch 2, 3 dc in the same corner space. Ch 1. In each of the next three corner spaces, work (3 dc, ch 2, 3 dc) and ch 1 between the corners. Join with a sl st to the top of the initial ch 3. (24 dc, 4 ch-2 spaces, 4 ch-1 spaces)
- Round 3: Sl st to the next corner space. Ch 3, 2 dc, ch 2, 3 dc in the same corner space. Ch 1, 3 dc in the next ch-1 space. Ch 1. In the next corner, work (3 dc, ch 2, 3 dc), ch 1, 3 dc in the next side space, ch 1. Repeat from * to * two more times. Join with a sl st to the top of the initial ch 3. (36 dc, 4 ch-2 spaces, 8 ch-1 spaces)
- Round 4: Continue in established pattern, working (3 dc, ch 2, 3 dc) in each corner and 3 dc in every side ch-1 space, separated by a ch 1. (48 dc, 4 ch-2 spaces, 12 ch-1 spaces)
Finishing
Once you reach the desired size, fasten off your yarn, leaving a 6-inch tail. Use your tapestry needle to weave the tail back and forth through the stitches on the back side of the square to secure it. Trim any excess yarn flush with the fabric.
Care & Washing Instructions
- Hand wash your finished squares in cool water using a mild wool-safe detergent to preserve the fibers.
- Lay the squares flat on a clean towel to air dry, ensuring they are not hung, which can cause them to stretch out of shape.
- Block your squares by pinning them to a foam board while damp to ensure the corners remain crisp and the dimensions remain uniform.
Pro Tips & Common Mistakes to Avoid
Maintain consistent tension by holding your yarn with a steady grip, as loose tension makes the gaps between dc clusters appear larger than intended. Place a removable stitch marker in the top of your beginning ch 3 to easily identify where to join your round, preventing the mistake of skipping the join or working into the wrong stitch. Weave your ends in by threading the yarn through the back loops of the stitches in the opposite direction you just crocheted, which keeps the yarn locked in place. If you wish to make a larger square, simply continue adding rounds by working a 3-dc cluster in every side ch-1 space until you reach your goal, noting that each additional round will require approximately 15% more yarn.
Frequently Asked Questions
Can I use variegated yarn for this pattern?
Yes, variegated yarn adds a unique color shift to each round. Keep in mind that the color transitions may result in uneven stripes if the color pooling is not consistent across all four sides.
Is this square suitable for a beginner?
This is an ideal project for beginners because it focuses on the double crochet stitch and the importance of chain spaces, which are fundamental skills in almost all crochet patterns.
How do I adjust the square size?
To make the square smaller, simply stop after round 2 or 3. To make it larger, continue the sequence of adding side clusters as demonstrated in round 4, adding one more cluster per side for every additional round.
Are these patterns allowed to be sold?
You are welcome to sell physical items created from this pattern, but please do not copy, distribute, or sell the written pattern instructions themselves. It is polite to credit the designer when selling your finished work.
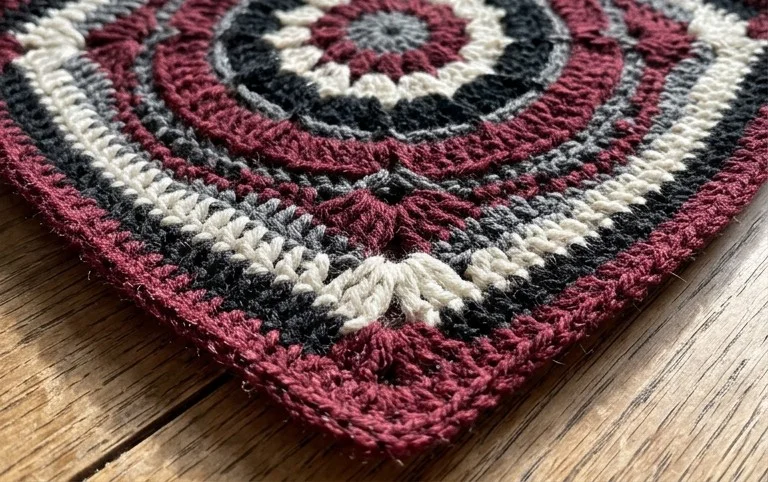
Your finished block creates a solid foundation for any throw or pillow cover you decide to assemble. You might try alternating cotton yarn for a stiffer finish, or use a larger hook if you want a lacier, more flexible fabric. Please take a photo of your work and post it online so others can see your color choices. I keep a variety of similar projects available on the blog, so continue browsing to find your next project. It is satisfying to finish these small components one by one.