2026 Ultimate Guide: Free One Skein Crochet Patterns
A single ball of cotton yarn transforms into a firm, charming figure that fits right in the palm of your hand. This small project results in a dense, uniform texture that looks polished and professional, even if your experience with a hook is limited. It serves as a soothing, low-stress activity for an afternoon, making it a reliable choice for handmade birthday gifts or quick home decorations. You will learn how to maintain consistent tension while navigating simple increases and invisible decreases in a spiral. Getting through these patterns helps you understand how to shape yarn into solid, three-dimensional objects without much fuss.
Why This Project Is Worth Making
This beginner-friendly project works up quickly, making it a staple for last-minute gifts or stash-busting. Because it relies on basic single crochet stitches worked in continuous rounds, you can easily complete it in a single evening while watching a movie. The dense fabric structure provides a professional look that hides stuffing well, ensuring your finished piece holds its shape permanently. Crocheters enjoy this pattern because it requires no complex color changes or difficult shaping, allowing you to focus on developing consistent tension.
I managed to finish three of these for my niece’s birthday in one weekend. The instructions are very clear and the sizing is spot on.
— Sarah, hobbyist crafter
Pattern Overview & Skill Level
- Skill Level: Beginner
- Approximate Time: 2–3 hours
- Construction: Amigurumi style, worked in continuous rounds using a magic ring for the start, followed by increases and decreases to create a 3D shape
- Finished Dimensions: Approximately 4 inches tall
Materials & Supplies Needed
- Yarn: Worsted weight (#4), 100% cotton, approximately 50 yards. Cotton provides the stitch definition required for amigurumi.
- Hook Size: 3.5 mm (US E-4). Using a hook smaller than recommended for the yarn weight keeps the stitches tight so stuffing does not show through.
- Notions: Tapestry needle, locking stitch markers, polyester fiberfill stuffing, and 9mm plastic safety eyes.
- Yarn Substitutions: Acrylic worsted yarn works as a budget-friendly alternative. Note that acrylic is stretchier than cotton, so you may need to stuff the item more firmly to prevent the fabric from sagging over time.
Stitch Guide & Abbreviations (US Terms)
- MR: Magic ring
- ch: Chain
- sc: Single crochet
- inc: Increase (work 2 sc in the same stitch)
- dec: Invisible decrease (insert hook into the front loop of the next two stitches, yarn over, pull through, yarn over, pull through both loops)
- sl st: Slip stitch
- st/sts: Stitch/stitches
Step-by-Step Pattern Instructions
Body and Head
- Rnd 1: Start 6 sc in a MR (6 sts).
- Rnd 2: Work 2 sc in each st around (12 sts).
- Rnd 3: [1 sc, inc] 6 times (18 sts).
- Rnd 4: [2 sc, inc] 6 times (24 sts).
- Rnd 5: [3 sc, inc] 6 times (30 sts).
- Rnd 6-12: Sc in each st around (30 sts).
- Rnd 13: [3 sc, dec] 6 times (24 sts).
At this stage, install the safety eyes between Rnd 9 and Rnd 10, spaced 5 stitches apart. Begin filling the piece with fiberfill as you continue the decreases.
- Rnd 14: [2 sc, dec] 6 times (18 sts).
- Rnd 15: [1 sc, dec] 6 times (12 sts).
- Rnd 16: [dec] 6 times (6 sts).
Finishing
Cut the yarn, leaving a 6-inch tail. Use your tapestry needle to weave the tail through the front loops of the remaining 6 stitches and pull tight to close the opening. Knot securely and bury the loose end inside the body. Ensure the stuffing is evenly distributed so the shape appears uniform and rounded.
Care & Washing Instructions
- Hand wash in cool water using a gentle detergent to prevent the fiberfill from clumping.
- Lay the piece flat on a towel to air dry, turning it occasionally to ensure all sides dry evenly.
- Avoid wringing or twisting the item while wet, as this can distort the shape and stretch the stitches.
Pro Tips & Common Mistakes to Avoid
- Maintain consistent tension by holding the yarn firmly; if your stitches are loose, the stuffing will peek through the gaps.
- Always place a stitch marker at the first stitch of every round to keep track of your count, as continuous rounds lack a clear seam.
- Weave your ends in by threading the needle through the interior of the piece multiple times, rather than just pulling them tight, to prevent unraveling.
- Adjust the size by using a heavier or lighter yarn weight; remember that changing the weight requires a corresponding adjustment in hook size and may change the amount of stuffing needed.
Frequently Asked Questions
Can I use a larger hook to make it faster?
Using a larger hook will make the stitches larger, which creates gaps in the fabric. This allows the fiberfill to show through. For the best result, stick to the recommended 3.5 mm hook or smaller.
Is this pattern suitable for complete beginners?
Yes, this is an ideal first project. It covers the essential skills of working in rounds, increasing, and decreasing, which are the foundations of all amigurumi projects.
How do I know if I have stuffed it enough?
The piece should feel firm to the touch, and the fabric should not look stretched. If you can see the white stuffing through the gaps between stitches, you are likely overstuffing or your tension is too loose.
Can I sell the items I make from this pattern?
Check the designer’s specific terms included with the original pattern file. Generally, individual makers can sell finished items, but mass production or reselling the written pattern is prohibited.
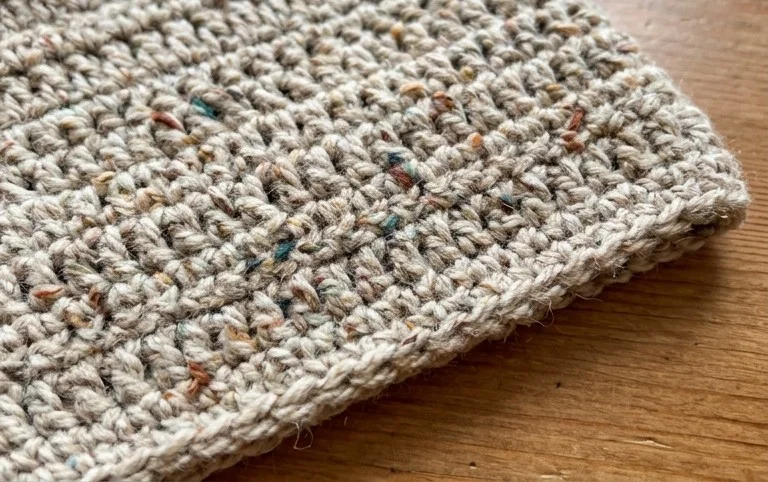
Your finished project feels substantial and looks like a shop-bought toy, standing as a proud achievement of your own hands. You might experiment with variegated wool for a speckled effect or choose a thicker velvet yarn to make a larger version for a cozy pillow. Sharing your finished photos online helps others find these designs for their own stash. Please browse the rest of the blog for more free patterns that turn your leftover yarn into useful items for friends, family, or your home bookshelf.