Easy Ribbed Crochet Beanie Pattern – Free Step-by-Step
This ribbed beanie feels like a soft, warm hug on a cold morning walk, providing a cozy layer that fits securely without feeling tight or restrictive. Beginners often appreciate how the consistent rhythm of half double crochet stitches creates a tidy, professional look without needing to learn complex increases or decreases. It acts as a reliable go-to project for those quiet evenings when you just need to keep your hands busy with soft yarn. By learning to work into the back loop only, you achieve a stretchy texture that rivals store-bought knit accessories, making it a satisfying choice for handmade winter gifts.
Why You’ll Love This Pattern
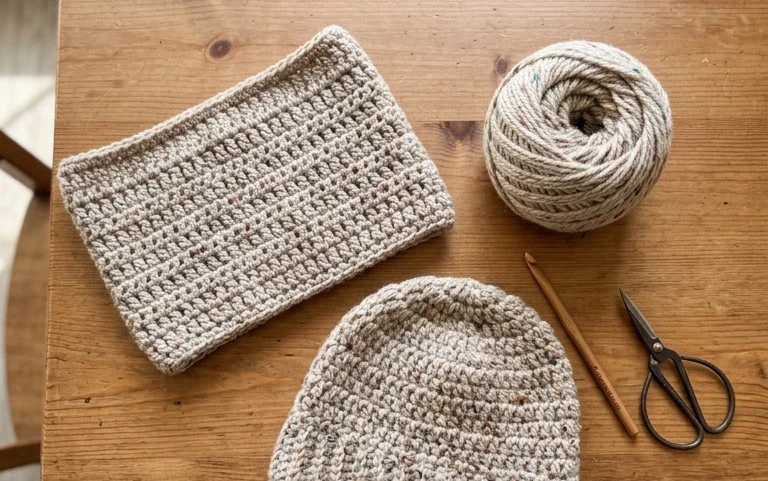
This crochet ribbed beanie offers a classic, fitted silhouette that suits every head shape. Because it is worked in vertical rows and joined into a tube, the resulting fabric has a high degree of natural stretch that comfortably accommodates different sizes. The pattern relies on simple half double crochet stitches worked exclusively in the back loop, which creates a textured, knit-like appearance without requiring specialized equipment. It is an ideal project for using up a single skein of premium yarn because the stitch density remains consistent throughout the body of the hat.
The repetitive motion of working rows of half double crochet back and forth makes this an excellent project to pick up while relaxing in the evening. You can finish the entire item in one or two sittings, making it a reliable choice for last-minute handmade gifts. The construction method eliminates the need for complex shaping, as the hat gains its shape through the tension of the ribbed stitches and the simple cinch at the crown during finishing.
I managed to whip this up in a single afternoon while watching a movie. The ribbed texture looks so professional and the fit is perfect for my husband, who usually finds store-bought hats too tight.
— Sarah, intermediate crafter
Pattern Overview & Skill Level
- Skill Level: Beginner
- Approximate Time: 3 to 5 hours
- Construction: Worked flat in one rectangular panel, joined at the side seam, and cinched at the top
- Finished Dimensions: 18 inches circumference (stretches to 22 inches) by 9 inches height
Materials & Supplies Needed
- Yarn: Worsted #4 weight, wool or acrylic blend, approximately 200 yards.
- Hook Size: 5.0 mm (US H-8).
- Notions: Tapestry needle for weaving ends and sewing the seam, measuring tape, and scissors.
- Safe yarn substitutions: You can use a cotton-acrylic blend for better breathability or a 100% wool yarn for increased warmth. Note that cotton has less elasticity than wool, so you may need to add a few extra rows to the starting chain if you choose a non-stretch fiber.
Stitch Guide & Abbreviations (US Terms)
- ch: chain
- hdc: half double crochet
- st/sts: stitch/stitches
- BLO: back loop only (insert hook into the loop furthest from you to create the ribbed effect)
- sl st: slip stitch
- FO: fasten off
Step-by-Step Pattern Instructions
Hat Body
- Row 1: Ch 45. Hdc in the second ch from the hook and in each ch across. Turn. (44 sts)
- Row 2: Ch 1, hdc in BLO of each st across to the end. Turn. (44 sts)
- Rows 3-60: Repeat Row 2 until the piece measures approximately 18 inches unstretched.
- Finishing the Body: Do not FO. Fold the rectangle in half so the short ends meet. Sl st the two edges together by working through the back loop of the last row and the starting foundation chain.
Crown Assembly
- Closing the Top: After seaming the side, keep your yarn attached. Thread your tapestry needle with the remaining tail. Weave the needle in and out of every other row along the top edge of the tube.
- Cinched Top: Pull the yarn tail firmly to gather the top of the hat tightly until the hole is completely closed. Secure the yarn with a knot and weave the end through the center of the crown to lock it in place.
- Final Step: Turn the hat right side out and trim any excess yarn tails.
Care & Washing Instructions
- Hand wash in cool water using a gentle wool detergent to preserve the elasticity of the stitches.
- Lay the beanie flat on a clean towel away from direct sunlight to air dry.
- Avoid wringing or twisting the hat, as this can permanently stretch the ribbed stitches out of shape.
Pro Tips & Common Mistakes to Avoid
- Maintain even tension throughout the rows, especially when working the BLO stitches, as tighter stitches at the edge can make the hat feel lopsided.
- Use a stitch marker on the very first stitch of every row to ensure you do not accidentally lose a stitch, which would result in a slanted edge.
- Weave your yarn tails in multiple directions through the seam to ensure they stay secure even when the hat is stretched over the head.
- Adjust the width of the hat by adding or subtracting rows of 44 stitches before joining, keeping in mind that each row adds approximately 0.4 inches to the circumference.
Frequently Asked Questions
Can I use a different yarn weight for this pattern?
Changing to a lighter weight yarn will require you to increase your starting chain count significantly to reach the desired height, while a heavier yarn may result in a very thick and stiff fabric. It is recommended to stick to a worsted #4 weight for the best balance of stretch and drape.
Is this pattern suitable for someone who has never crocheted before?
Yes, this is an ideal first project. It requires only the half double crochet stitch and introduces the basic concept of working in the back loop to create texture, which is a foundational skill in garment construction.
How do I resize this for a child?
To make a smaller hat, simply reduce the starting chain count by 5 to 10 stitches and work fewer total rows until the piece wraps around the child’s head snugly. The construction remains identical regardless of the final size.
Can I sell the hats I make from this pattern?
You are welcome to sell finished items made from this pattern, provided you credit the designer and use your own photographs for the product listings.
Seeing your finished hat take shape is a rewarding experience, especially when you wrap it around your head for that first cold snap. You can adjust the size for a more slouchy fit by adding extra rows or switch to a variegated wool blend to create a unique color palette. Please share a photo of your cozy creation on social media so others can see your work. Feel free to browse through the rest of the blog for more free patterns to start your next project.